Use board image provided by Xilinx
Quick Start Guide for Zynq™ UltraScale+™
To improve the user experience, the Vitis AI Runtime packages, VART samples, Vitis-AI-Library samples and models have been built into the board image.
Installing a Board Image.
Download the SD card system image files from the following links:
(Optional) Running
zynqmp_dpu_optimize.shto optimize the board setting.
Download the vitis_ai_runtime_r2.5.x_image_video.tar.gz to the target.
Unzip the
vitis_ai_runtime_r2.5.x_image_video.tar.gzpackage on the target.1
tar -xzvf vitis_ai_runtime_r*2.5*_image_video.tar.gz -C Vitis-AI/examples/VART
Enter the directory of samples in the target board. Take
resnet50as an example.1
cd ~/Vitis-AI/examples/VART/resnet50
Run the example.
1
./resnet50 /usr/share/vitis_ai_library/models/resnet50/resnet50.xmodel

Launching Commands for VART Samples on edge
No. Example Name Command 1 resnet50 ./resnet50 /usr/share/vitis_ai_library/models/resnet50/resnet50.xmodel 2 resnet50_pt ./resnet50_pt /usr/share/vitis_ai_library/models/resnet50_pt/resnet50_pt.xmodel ../images/001.jpg 3 resnet50_ext ./resnet50_ext /usr/share/vitis_ai_library/models/resnet50/resnet50.xmodel ../images/001.jpg 4 resnet50_mt_py python3 resnet50.py 1 /usr/share/vitis_ai_library/models/resnet50/resnet50.xmodel 5 inception_v1_mt_py python3 inception_v1.py 1 /usr/share/vitis_ai_library/models/inception_v1_tf/inception_v1_tf.xmodel 6 pose_detection ./pose_detection video/pose.webm /usr/share/vitis_ai_library/models/sp_net/sp_net.xmodel /usr/share/vitis_ai_library/models/ssd_pedestrian_pruned_0_97/ssd_pedestrian_pruned_0_97.xmodel 7 video_analysis ./video_analysis video/structure.webm /usr/share/vitis_ai_library/models/ssd_traffic_pruned_0_9/ssd_traffic_pruned_0_9.xmodel 8 adas_detection ./adas_detection video/adas.webm /usr/share/vitis_ai_library/models/yolov3_adas_pruned_0_9/yolov3_adas_pruned_0_9.xmodel 9 segmentation ./segmentation video/traffic.webm /usr/share/vitis_ai_library/models/fpn/fpn.xmodel 10 squeezenet_pytorch ./squeezenet_pytorch /usr/share/vitis_ai_library/models/squeezenet_pt/squeezenet_pt.xmodel
2022.1 Vitis™ Platform Creation Tutorials
We’ll introduce the platform creation steps in the following pages. Each page describes one major step in the platform creation process.
- Step 1: Create the Vivado Hardware Design and Generate XSA
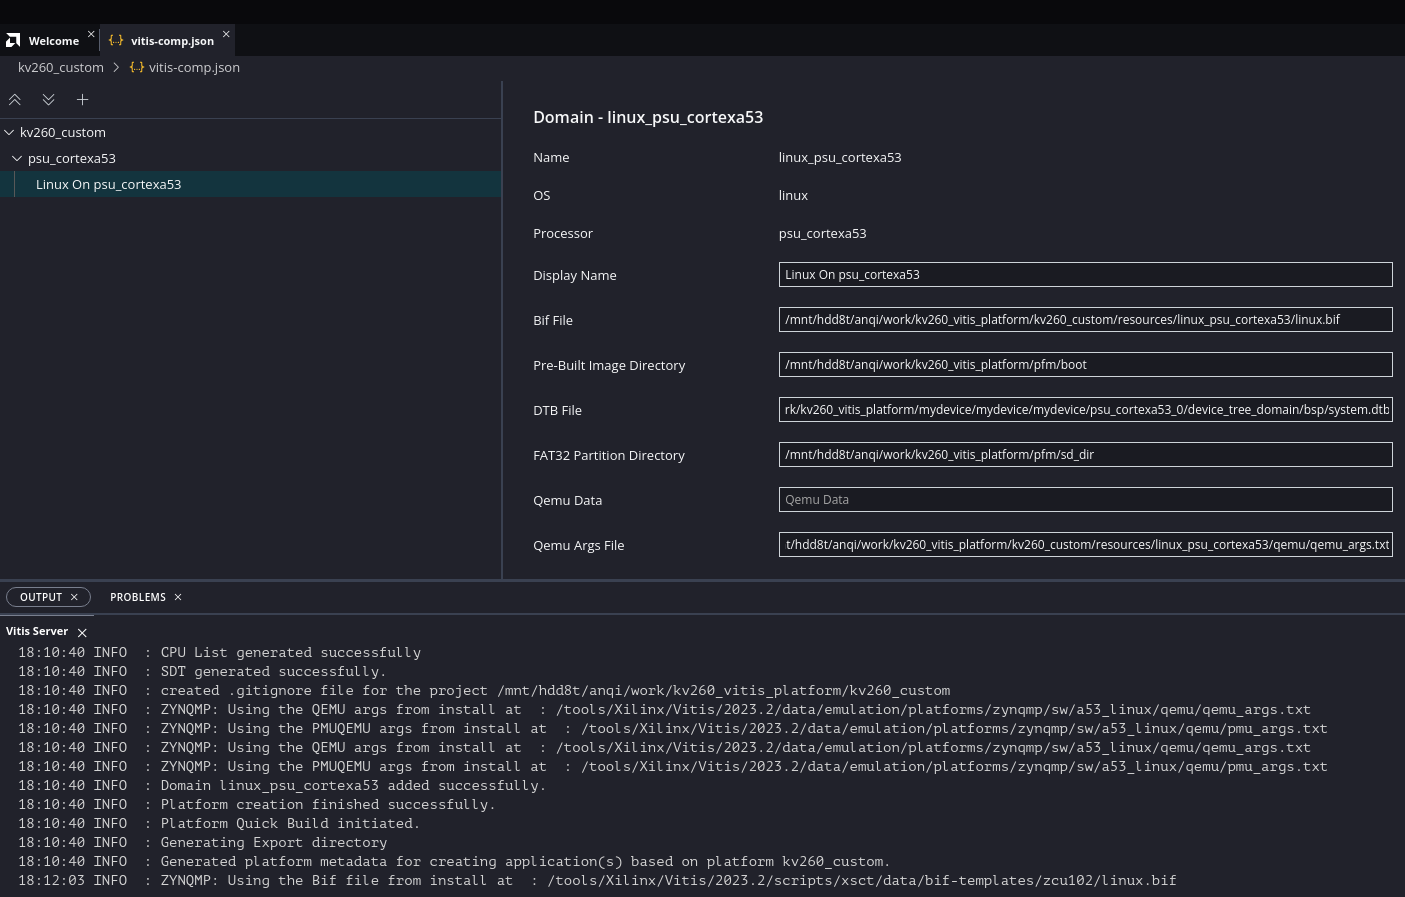
- Step 2: Create the Vitis Platform
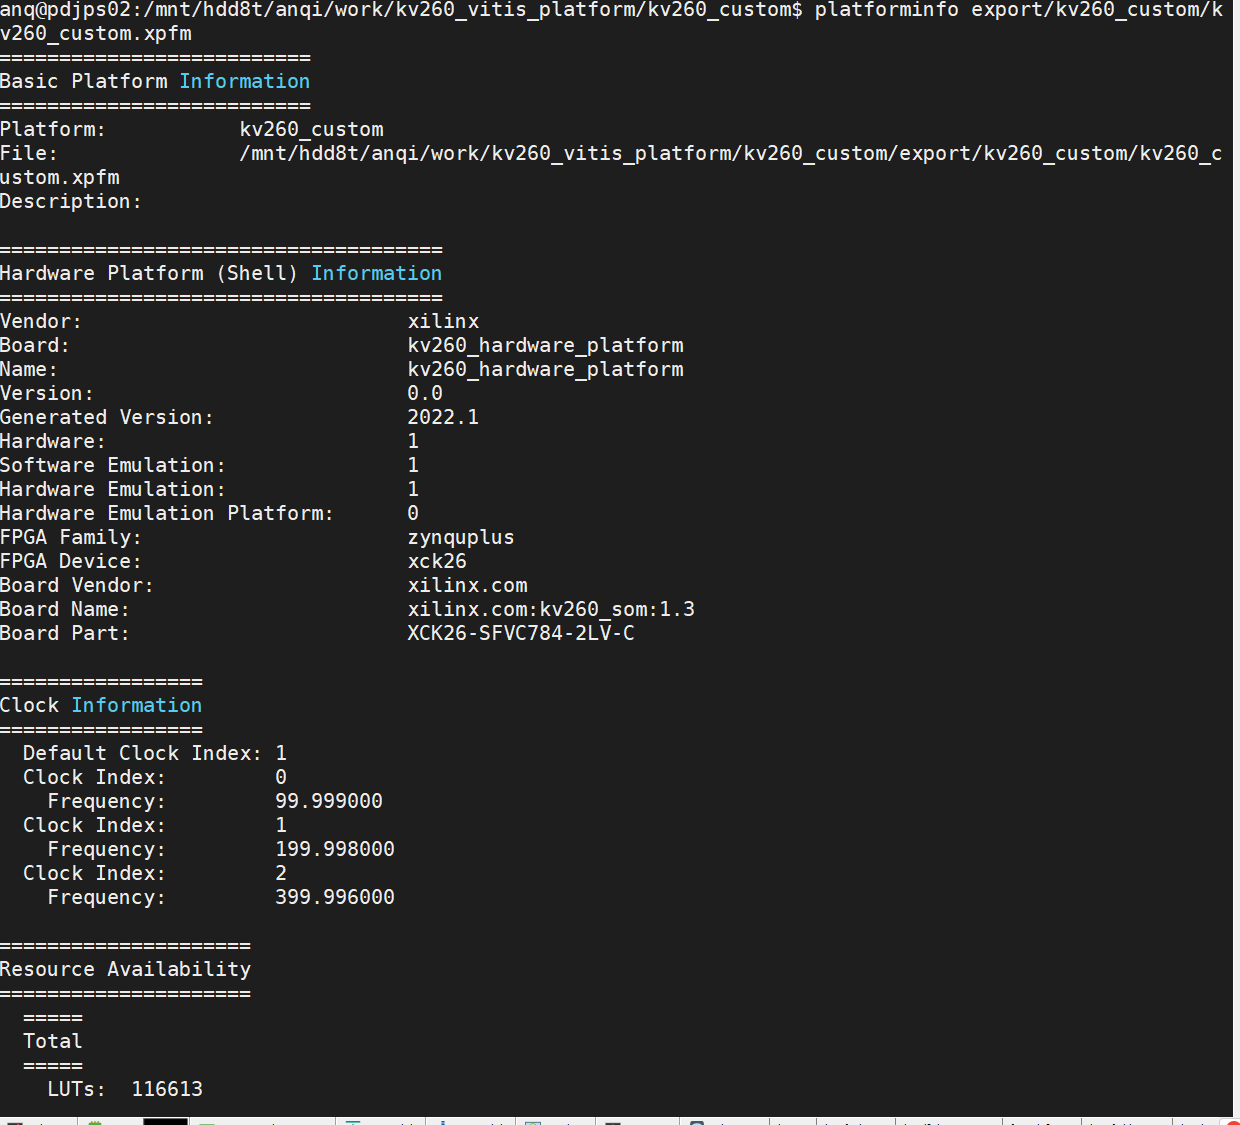
- Step 3: Test the Platform
Let’s start from step 1: Vivado Design.
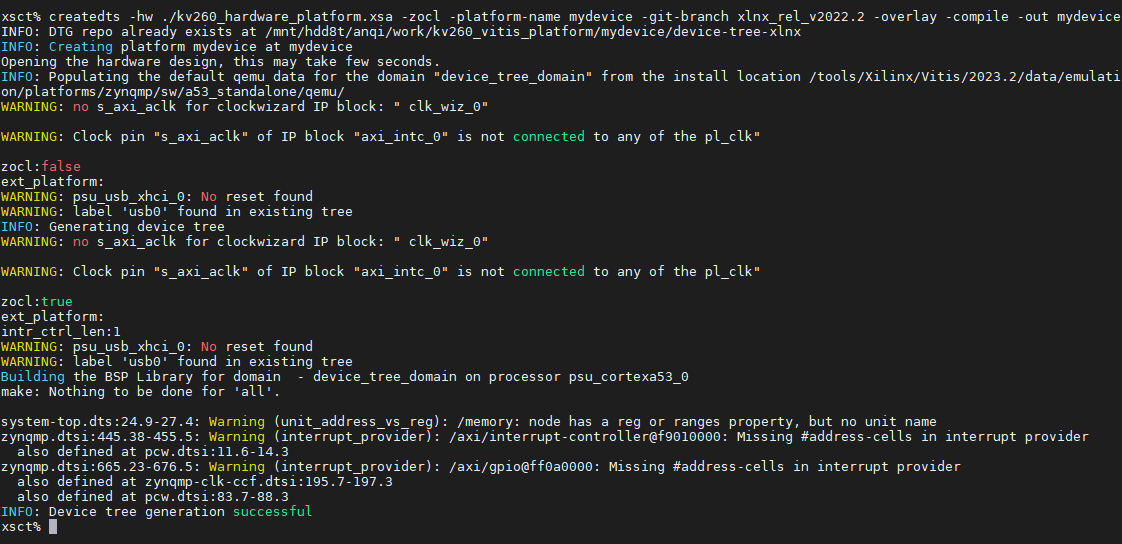
When i do step2, there were 1 issue.
1 | xsct% createdts -hw ./kv260_hardware_platform.xsa -zocl -platform-name mydevice -git-branch xlnx_rel_v2022.1 -overlay -compile -out mydevice |
I switched to the xlnx_rel_v2022.2 branch then it succeed.
Use petalinux to build a board image
Install Petalinux SDK and BSP
Get PetaLinux Tools - Installer - 2023.2 Full Product Installation from the following links, and install it:
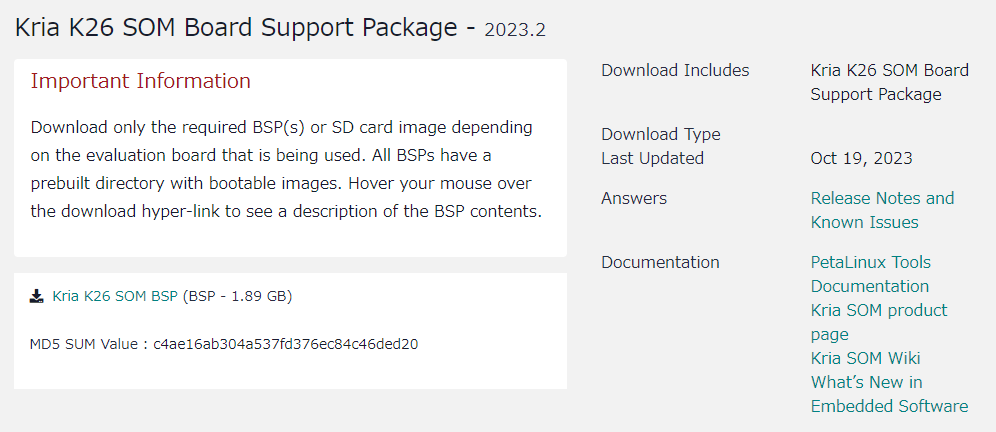
Download Kria K26 SOM Board Support Package from the following link:
Build Board Image
Creating a Project Using PetaLinux BSP
Try to create a project from BSP use the following command:
1 | petalinux-create -t project --template zynqMP --force -n kv260 -s ../BSPs/xilinx-kv260-starterkit-v2023.2-10140544.bsp |

Building the Linux Image With Petalinux Using recipes-vitis-ai
REF: Integrating the DPU - Rebuilding the Linux Image With Petalinu
Copy the
recipes-vitis-aifolder to<petalinux project>/project-spec/meta-user/1
cp -r /home/anq/workspace/Vitis-AI/src/vai_petalinux_recipes/recipes-vitis-ai /home/anq/workspace/kv260/kv260/project-spec/meta-user/

Delete either
recipes-vitis-ai/vart/vart_3.5.bborrecipes-vitis-ai/vart/vart_3.5_vivado.bbdepending on workflow that you have selected for your design. If you userecipes-vitis-ai/vart/vart_3.5_vivado.bbplease rename itrecipes-vitis-ai/vart/vart_3.5.bb.
Edit
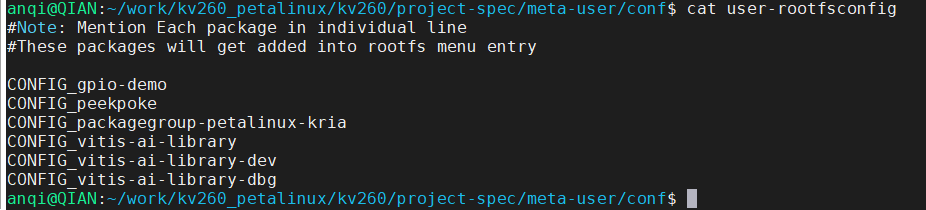
<petalinux project>/project-spec/meta-user/conf/user-rootfsconfigfile, appending the following lines:1
2
3CONFIG_vitis-ai-library
CONFIG_vitis-ai-library-dev
CONFIG_vitis-ai-library-dbg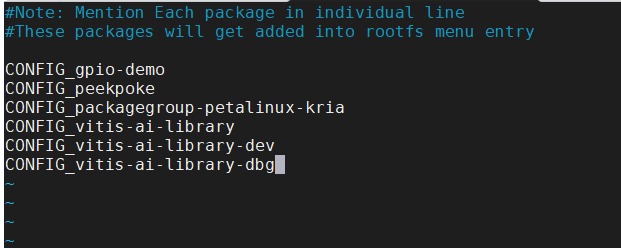
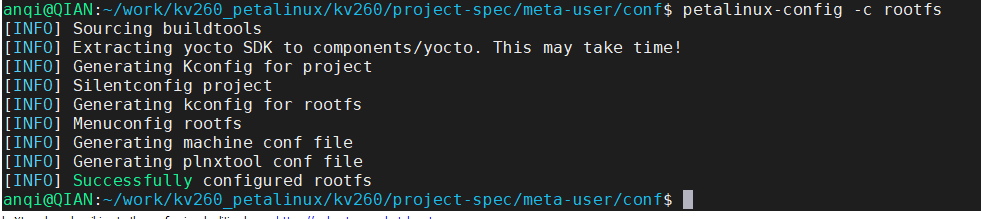
Source PetaLinux tool and run
petalinux-config -c rootfscommand. Select the follo wing option. Save and exit.1
2
3
4
5
6Select user packages --->
Select [*] vitis-ai-library
Select [Filesystem packages] ---> [libs]
Select [*] xrt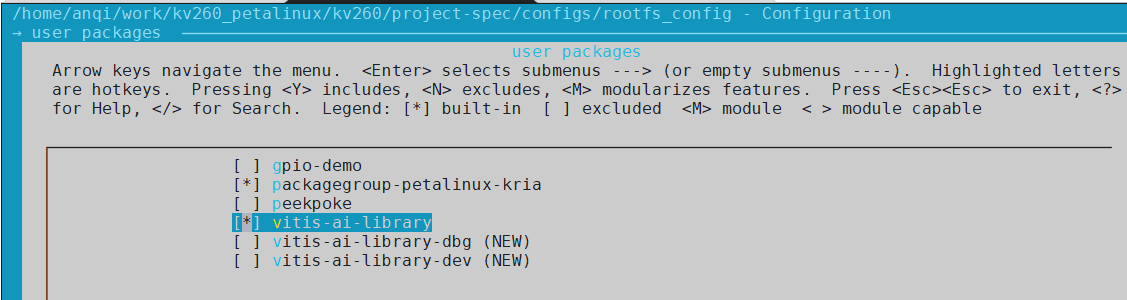
Run
petalinux-build.When i was building project, there were 2 issues.
a. 0001-glog-enable-fatal-throw-exception.patch is already applied.
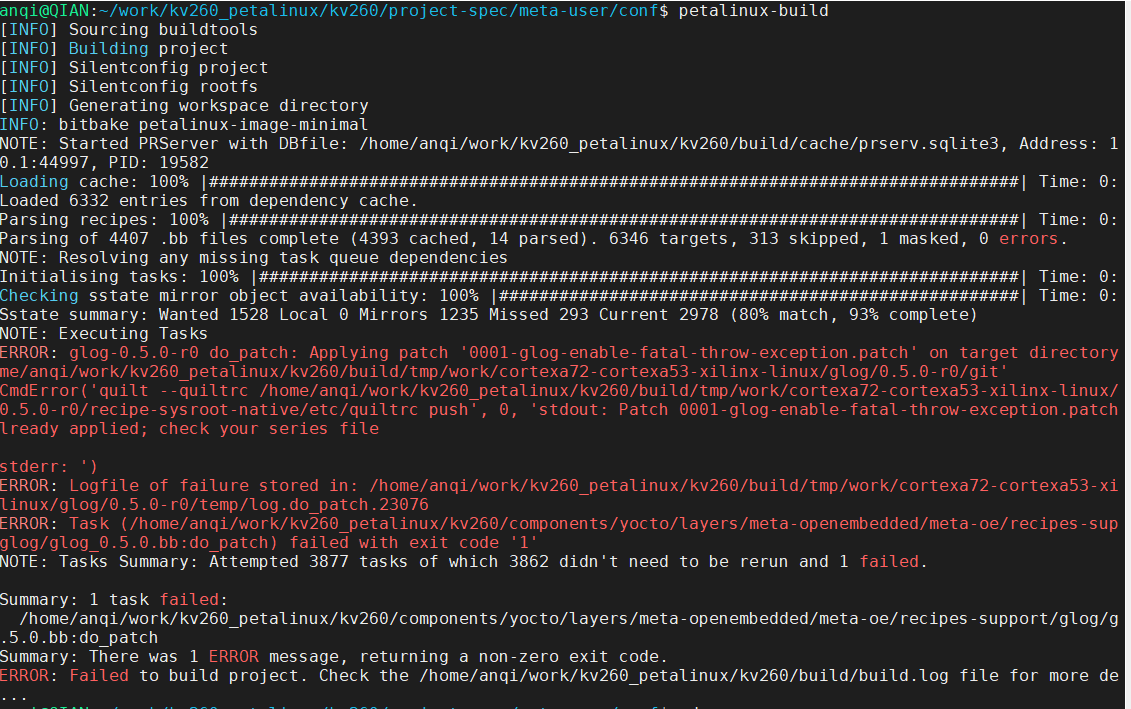
As i checked how many times the patch is used, i found 2 results.
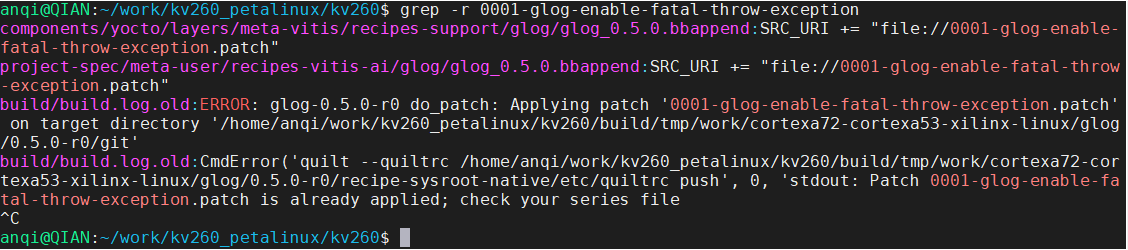
Therefore, i commented out one of them in glog_0.5.0.bbappend.

Then rebuild project, this issue seems to be resolved.
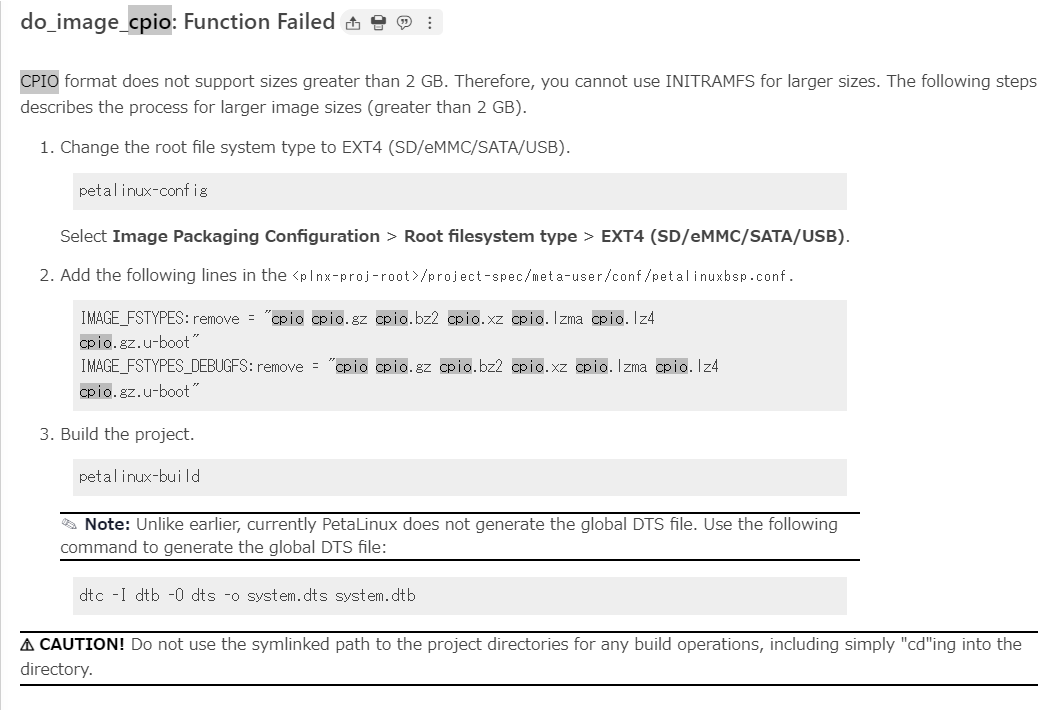
b. cpio: cannot seek on output: Invalid argument
1
2
| cpio: cannot seek on output: Invalid argument
| WARNING: exit code 2 from a shell command.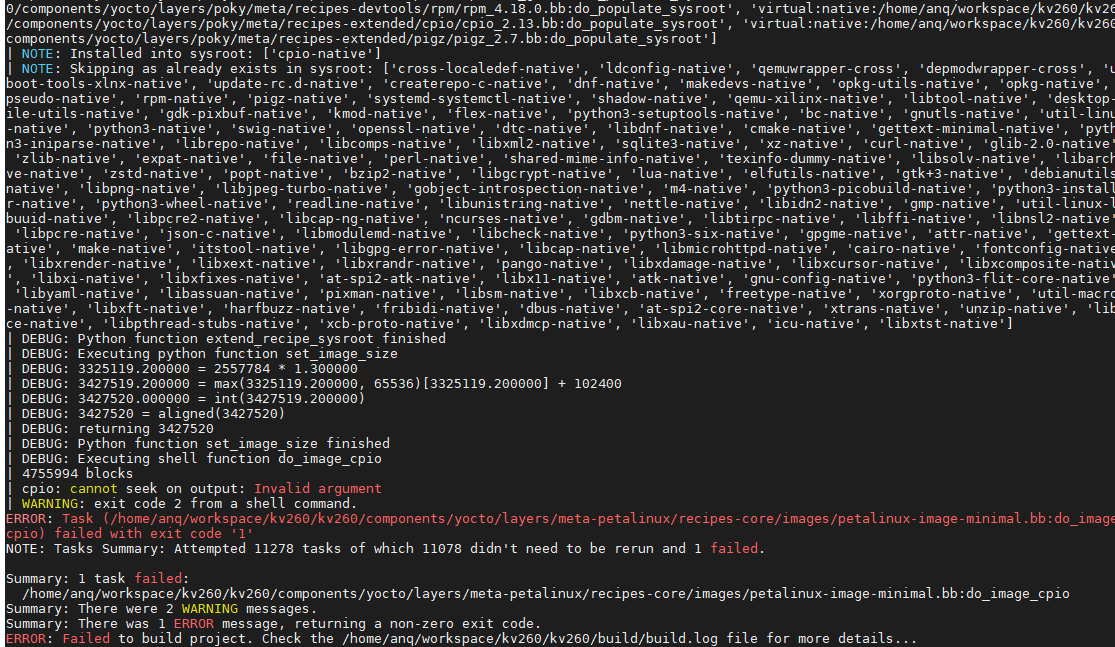
I found the solution in the Petalinux manual:
「do_image_cpio: Function Failed」というエラー メッセージが表示される
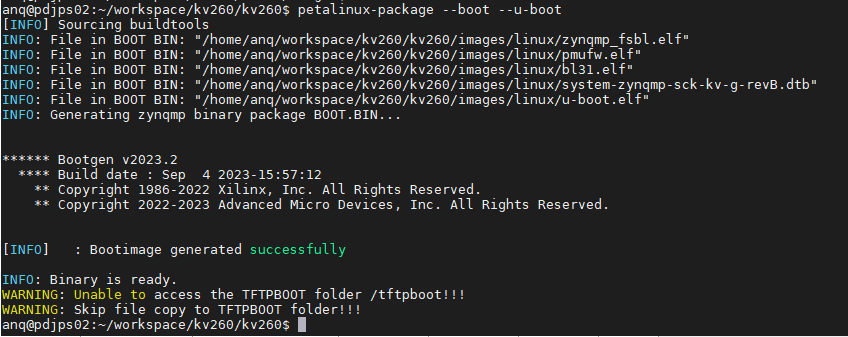
Generate Boot Image
The boot image can be put into Flash or SD card. When you power on the board, it can boot from the boot image. A boot image usually contains a first stage boot loader image, FPGA bitstream, PMU firmware, TF-A, and U-Boot.
Execute the following command to generate the boot image in .BIN format.
1 | petalinux-package --boot --u-boot |
Booting PetaLinux Image on Hardware with an SD Card
You can boot a PetaLinux image on hardware using an SD card by copying the required images manually.
Copy the following files from <plnx-proj-root>/images/linux or <plnx-proj-root>/pre-built/linux/images/ into the boot directory of the first partition, which is in FAT32 format in the SD card:
- BOOT.BIN
- image.ub
- boot.scr
Set the boot mode of the board to SD boot.
Plug the SD card into the board.
Power on the board.